3/1/06 I ordered kit 5 this morning.
3/1/06
I ordered kit 5 this morning.
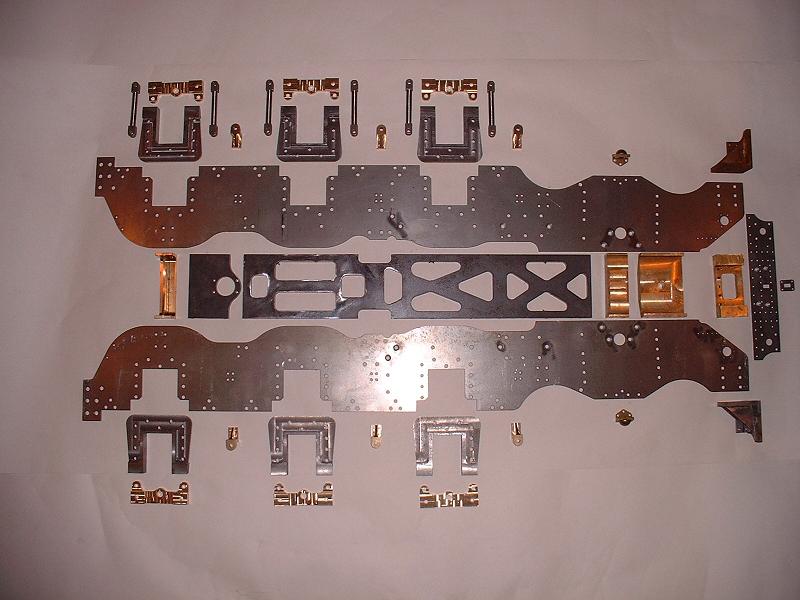
5/1/06 Kit 5 arrived this morning. It consists of the locomotive main frames, stretchers, horns, bogie bolster, and front buffer beam. I checked and photographed the contents. It looks as though the kit should go together quite quickly once the parts have been polished up with file and emery cloth.
6/1/06 I loosely assembled the entire kit - albeit not fitting every nut and bolt - to check that it all fits together, which it does. This only took a couple of hours - a change from the relatively labour-intensive work on the tender, although much of that was down to my own improvements. I now just need to dismantle it, polish the parts up, and assemble it properly.
 9/1/06
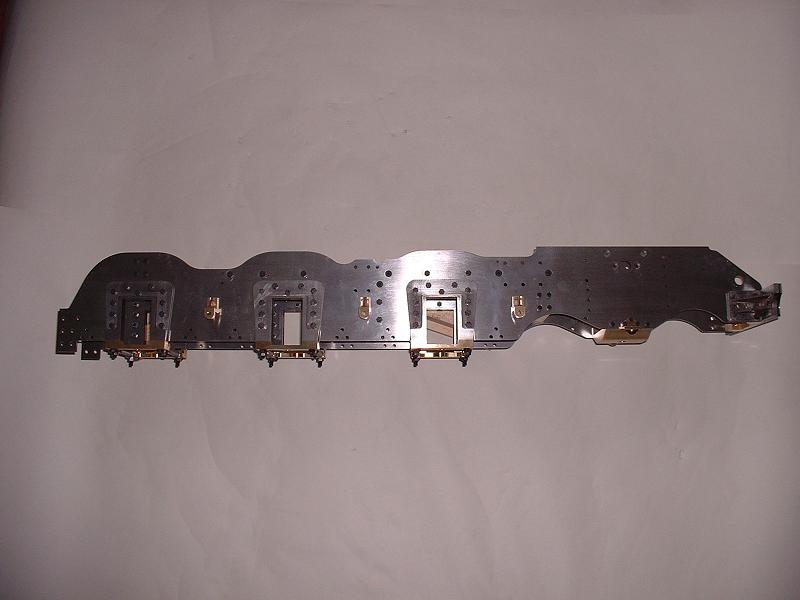
I have now polished and assembled the frames and horns - it took a few hours to do a thorough job of this, but I think it's worth the effort. The edges of the frames have a black residue from the laser cutting machine which needs to be removed by draw-filing - holding the file flat across the edge of the steel with both hands and drawing it backwards and forwards, which gives a very clean flat finish. I cleaned the faces of the frames with medium emery cloth, which leaves fine scratches that give a better key for the paint, so I'm told. The next job is to polish the stretchers and buffer beam. I've now ordered a new PC which should arrive next week, and I've had the data recovered from my failed PC, which is a great relief. My ancient 486 soldiers on in the meantime.
9/1/06
I have now polished and assembled the frames and horns - it took a few hours to do a thorough job of this, but I think it's worth the effort. The edges of the frames have a black residue from the laser cutting machine which needs to be removed by draw-filing - holding the file flat across the edge of the steel with both hands and drawing it backwards and forwards, which gives a very clean flat finish. I cleaned the faces of the frames with medium emery cloth, which leaves fine scratches that give a better key for the paint, so I'm told. The next job is to polish the stretchers and buffer beam. I've now ordered a new PC which should arrive next week, and I've had the data recovered from my failed PC, which is a great relief. My ancient 486 soldiers on in the meantime.
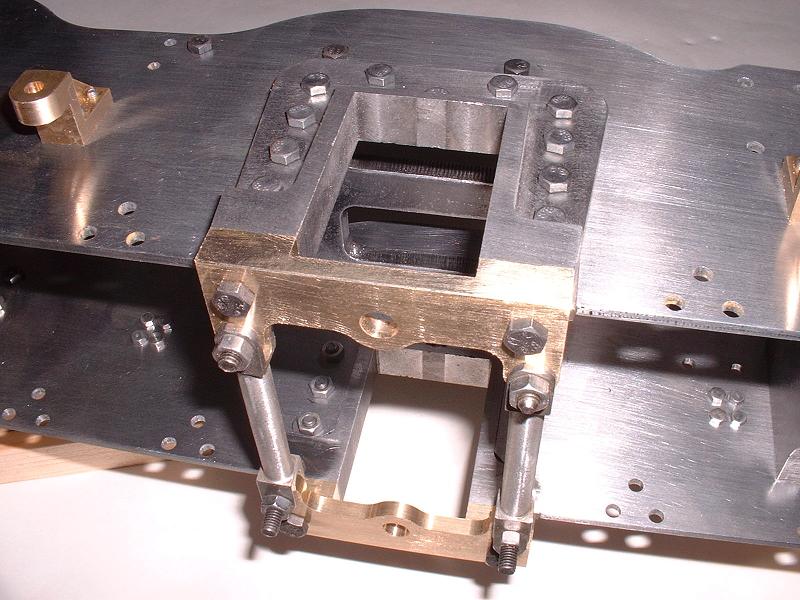
11/1/06 I've cleaned up all the stretchers and bolted the frames and stretchers together. This photograph shows the detail of one of the horn blocks and its horn stay and stretchers. I don't know why the bolts on the left-hand ends of the stretchers are longer than those of the right - presumably something else will be attached to them in a later kit. The only job remaining on kit 5 is to rivet the buffer beam and bolt it to the front of the frames.
 12/1/06
My new PC arrived today and I've spent most of the day setting it up, so I should be able to finish kit 5 over the weekend and post some pictures of the completed chassis.
12/1/06
My new PC arrived today and I've spent most of the day setting it up, so I should be able to finish kit 5 over the weekend and post some pictures of the completed chassis.
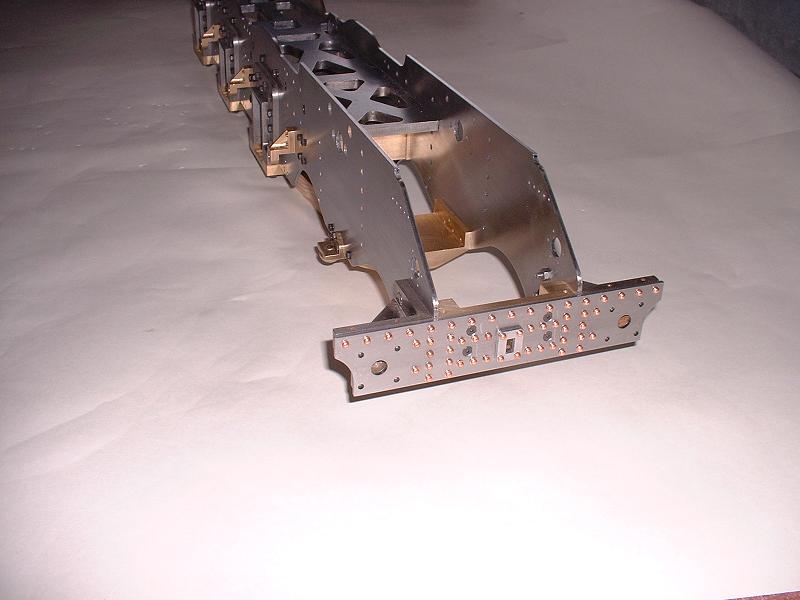
14/1/06 I finished rivetting the buffer beam and bolted it to the front of the frames, thus completing kit 5. I'll now do a bit more work on the tender, and order kit 6 sometime next week.
18/1/06 I ordered kit 6 today.
3/4/07 I removed the complete front buffer beam along with its brackets and buffer stocks from the main frames in order to prepare it for painting. I decided to try filling the four allen screw heads with solder rather than filler in the hope of getting a flatter finish than I managed to achieve on the tender buffer beam. This proved rather troublesome because the solder refused to flow into the socket heads, despite using the Carr's Green Label flux which worked well on the screw heads in the firebox door runners, and I ended up with solder all over the adjacent rivet heads. To rectify this I removed all the rivets from the central area, replaced the allen screws with ordinary slotted screws, and was then able to fill the screw heads with solder successfully. With no rivets in the way, it was relatively easy to file and sand the solder down to a good flat finish. I then fitted new rivets - I had to use Loctite for this rather than hammering them down, since the backs were covered by the brass stretcher.
6/4/07 We had our first proper sail of the 2007 season yesterday, to Newtown Creek on the Isle of Wight - a lovely sunny day with a good sea breeze to fill the sails. I've airbrushed two-part etch primer over the non-ferrous areas of the buffer beam, and followed up with rust-stabilising primer over the whole lot. The soldered screw heads are now completely invisible.
8/4/07 I've painted the rear of the buffer beam black and I'll leave this to harden for a few days before masking it up to paint the front red. I visited the North London SME track at St Albans today and saw Tony's freshly repainted Britannia steaming.
11/4/07 Back from another couple of days sailing to Cowes and back, making the most of the fine weather. Today I've airbrushed the red paint onto the front buffer beam, although I think it may need another session to get a good deep finish.
12/4/07 On closer inspection the red paint has an 'orange peel' texture, and I know from experience that it's impossible to rub this down flat satisfactorily on a surface covered in rivets. I've therefore stripped it all back to bare metal by scrubbing with cellulose thinners, and will start again. Painting is not my favourite pastime!
| Next Kit | Previous Kit | Index |